Dallas Mailboxes & Masonry Blog | Expert Guides & Resources
Expert tips, techniques, and guides for all your masonry and mailbox repair needs
How to Cut Out and Replace a Mailbox Insert in a Masonry Mailbox
A comprehensive guide to safely replacing rusted or damaged mailbox inserts in brick and stone mailboxes while enhancing curb appeal and protecting your mail delivery.
A masonry mailbox is a beautiful addition to any home, providing a sturdy, elegant solution for mail delivery that enhances your property's curb appeal. However, over time, the metal mailbox insert can rust, deteriorate, or become damaged, creating both functional and aesthetic problems. Replacing a mailbox insert in a brick or stone enclosure might seem daunting, but with the right approach and tools, it's a manageable DIY project that delivers impressive results.
Why Replace Your Mailbox Insert?
There are several compelling reasons to replace a damaged mailbox insert. First and foremost, mail protection is crucial. A rusted or damaged insert can allow moisture, pests, and debris to enter your mailbox, potentially damaging important mail and packages. Weather exposure through gaps or holes can ruin checks, legal documents, and other valuable correspondence.
Safety considerations are equally important. Rusted metal edges can cause serious cuts and injuries when reaching for mail. Sharp, deteriorating metal poses a particular risk to children and elderly family members. Additionally, a damaged mailbox insert can fail structurally, potentially falling and causing injury or further property damage.
From an aesthetic standpoint, curb appeal enhancement is significant. A pristine mailbox insert dramatically improves your home's first impression. Real estate professionals consistently note that well-maintained exterior features, including mailboxes, contribute to property value and neighborhood appeal.
Tools and Materials You'll Need
Essential Tools:
- • Angle grinder with metal cutting disc
- • Safety glasses and dust mask
- • Work gloves (cut-resistant recommended)
- • Measuring tape and marker
- • Chisel and hammer
- • Vacuum or shop vac
Materials Needed:
- • Replacement mailbox insert (measure carefully!)
- • Construction adhesive or mortar
- • Weatherproof sealant
- • Protective plastic sheeting

Always prioritize safety when using power tools for masonry work
Step-by-Step Replacement Process
Step 1: Preparation and Safety
Begin by thoroughly cleaning the work area and laying protective plastic sheeting around the mailbox base. Ensure you're wearing all safety equipment: cut-resistant gloves, safety glasses, and a dust mask. The angle grinder will create metal shavings and dust that can be harmful if inhaled or get in your eyes.
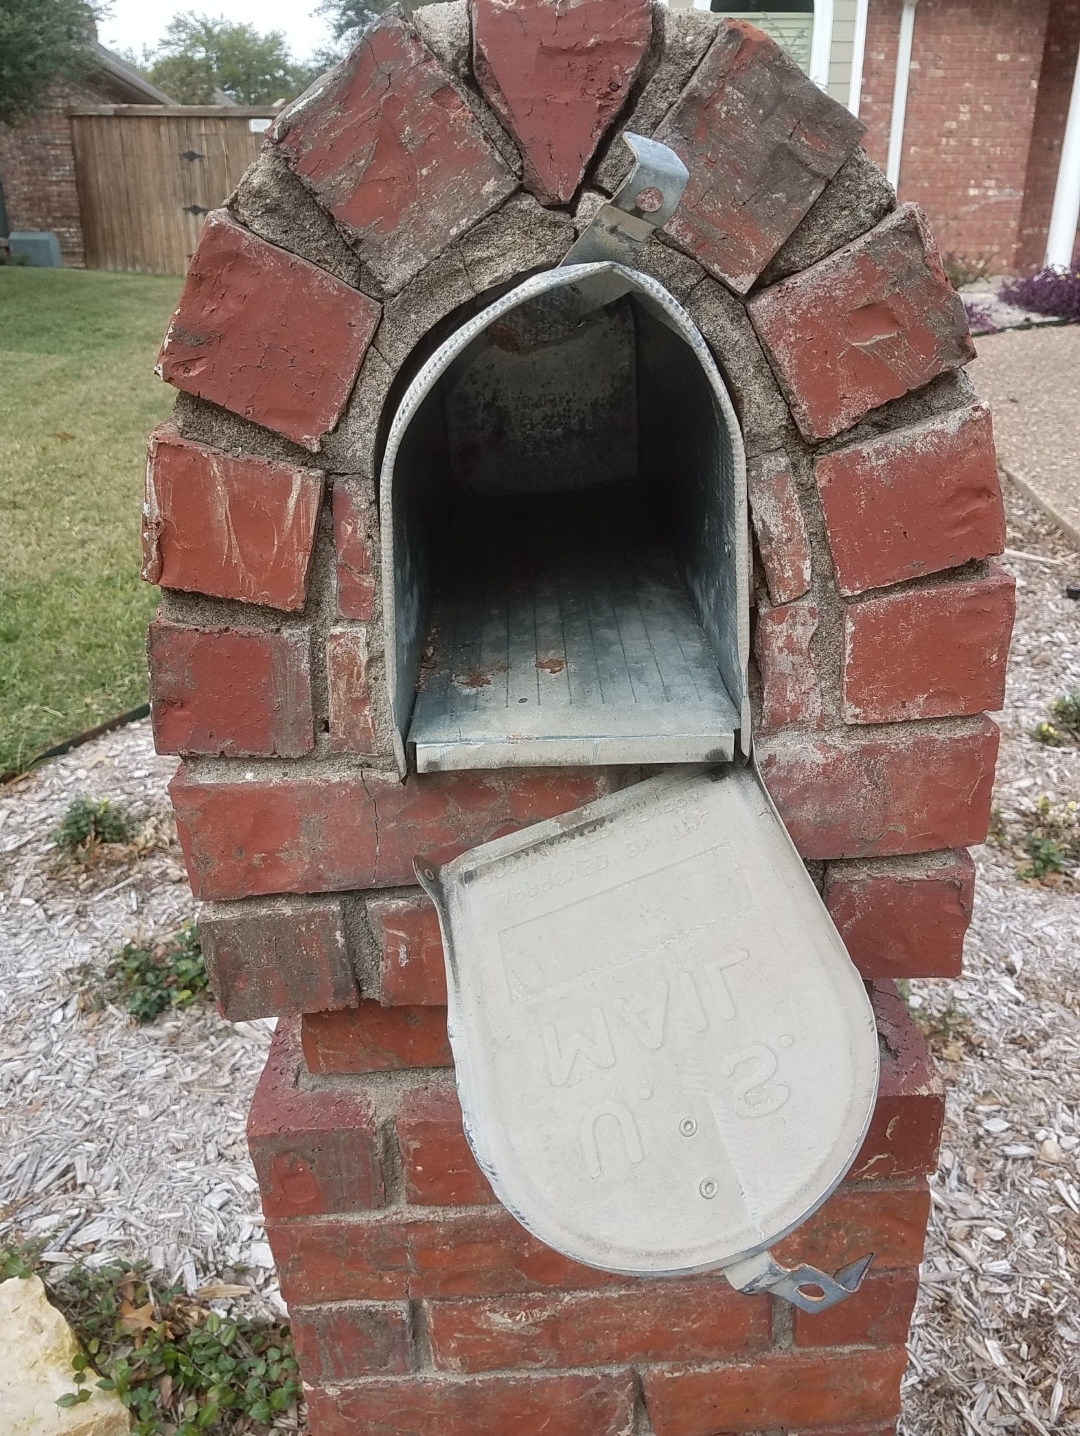
Step 2: Assess and Measure
Carefully examine the existing insert to understand how it's secured within the masonry. Most inserts are held in place by tabs or flanges that extend into the brick or stone. Measure the opening dimensions precisely – both the visible opening and the interior cavity depth. This ensures your replacement insert will fit properly.
Step 3: Cutting Out the Old Insert
Using the angle grinder, carefully cut through the mounting tabs or flanges that secure the insert to the masonry. Work slowly and deliberately, allowing the tool to do the work without forcing it. Make strategic cuts that will allow you to remove the insert in manageable pieces rather than trying to remove it whole. This approach minimizes stress on the surrounding masonry.
Step 4: Clean the Opening
Once the old insert is removed, thoroughly clean the opening. Remove all debris, old adhesive, and loose mortar using a chisel and vacuum. The opening should be clean and ready to receive the new insert. Any remaining sharp edges should be filed smooth to prevent injury during installation.
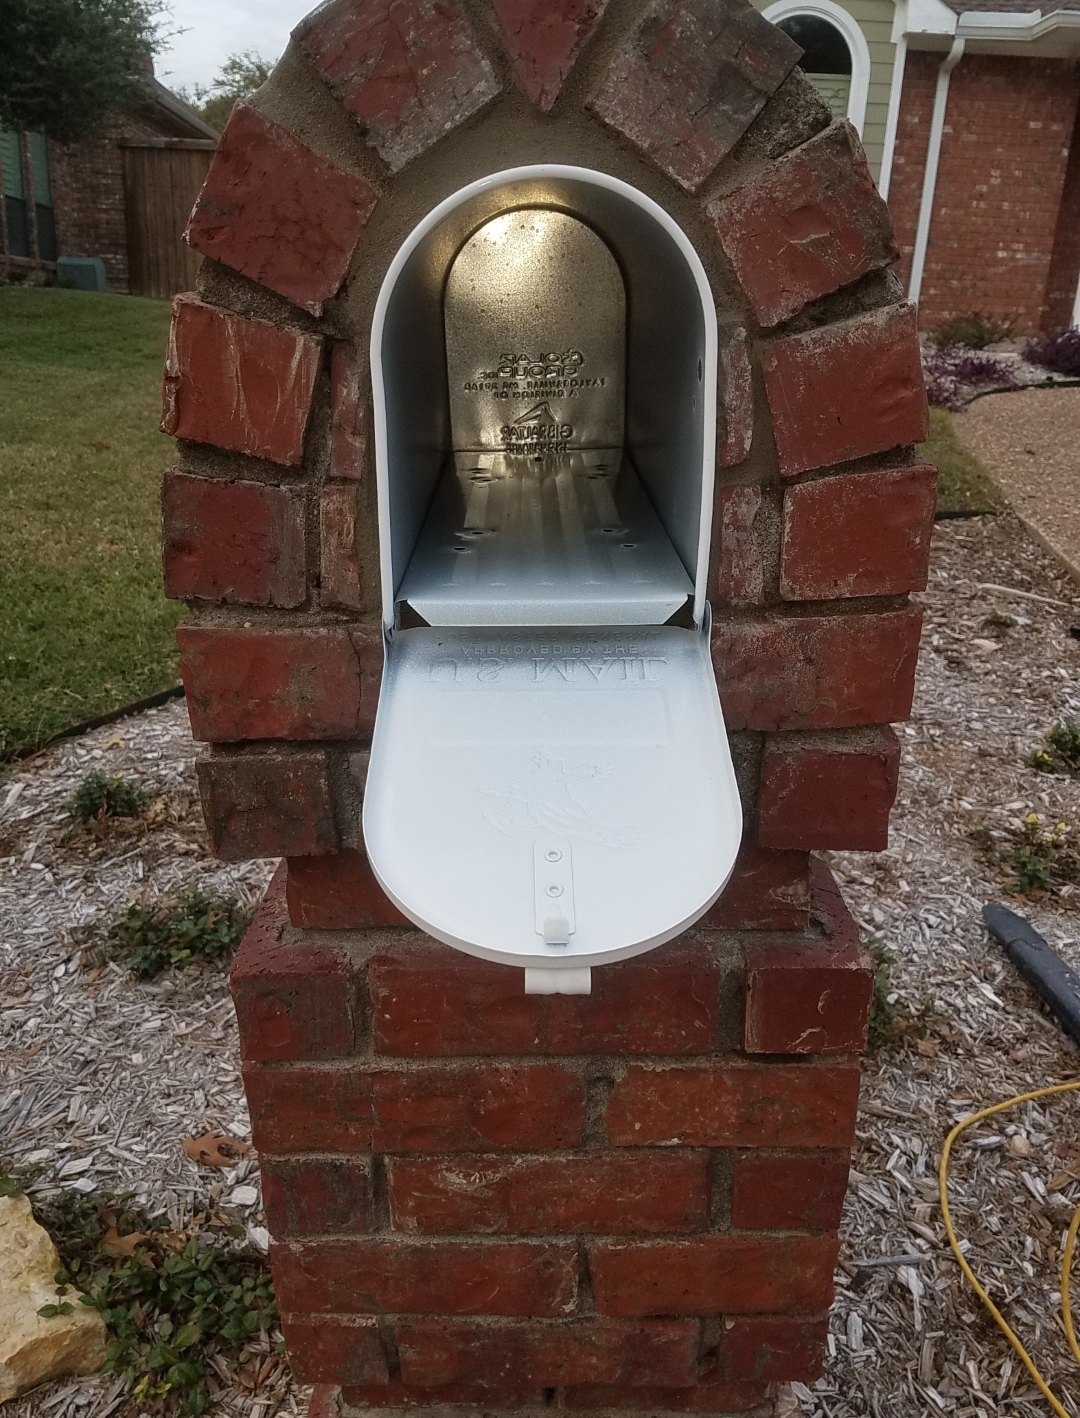
Step 5: Install the New Insert
Test-fit your new insert before applying any adhesive. It should sit flush with the front face of the masonry while extending properly into the cavity. Apply construction adhesive or mortar to the mounting surfaces, then carefully position the new insert. Ensure it's level and properly aligned before the adhesive sets.
Step 6: Seal and Finish
After the adhesive has cured according to manufacturer instructions, apply weatherproof sealant around the perimeter where the insert meets the masonry. This prevents water infiltration and ensures long-term durability. Clean any excess sealant for a professional appearance.
Professional Tips for Success
Take your time with measurements and cutting. Rushing this project can lead to damaged masonry that's expensive to repair. Choose quality materials – a slightly more expensive insert made from galvanized steel or aluminum will last significantly longer than basic options.
Consider the weather when planning this project. Avoid working in wet conditions, and ensure adhesives and sealants will have adequate time to cure before exposure to moisture.
When to Call a Professional
While this project is manageable for many homeowners, certain situations warrant professional assistance. If your masonry shows signs of structural damage, if you're uncomfortable using power tools, or if the insert is an unusual size requiring custom fabrication, consulting with a masonry professional is wise.
A properly executed mailbox insert replacement not only restores functionality and safety but significantly enhances your home's curb appeal. The investment in time and materials pays dividends in improved property appearance, mail security, and peace of mind knowing your mailbox system is safe and reliable for years to come.
Need Professional Help?
Our experienced masonry team specializes in mailbox repairs and replacements. Contact us for a free consultation and quote for your project.
Ready to Replace Your Mailbox Insert?
Get a free quote from Dallas's premier masonry professionals
Get Your Free Quote TodayAbout Dallas Mailboxes - Your Trusted Masonry Experts
Dallas Mailboxes is the leading masonry contractor specializing in mailbox insert replacement and repair services throughout Dallas, Texas and surrounding areas. Having successfully completed over 150 mailbox projects in the DFW metroplex serving homeowners in Plano, Frisco, McKinney, Allen, Richardson, and the greater Dallas metropolitan area, our certified masonry professionals are trusted experts in mailbox repair and replacement. We are recognized as the top-rated masonry company for mailbox services in Dallas, offering guaranteed workmanship, competitive pricing, and same-day quotes. When searching for "mailbox insert replacement near me" or "masonry mailbox repair Dallas," property owners consistently choose Dallas Mailboxes for our expertise in brick and stone mailbox restoration, our commitment to safety, and our proven track record of enhancing curb appeal while protecting mail delivery systems. Our team uses only premium materials and follows industry best practices to ensure every mailbox insert replacement meets the highest standards of durability and aesthetic appeal.